Deploy User VMs
Deploy UVMs
Since this is a new environment, we need user VMs to check our routes and generate traffic. This step typically wouldn’t be done in a customers environment as it’s assumed they already have VMs. Run the shell script uvm.sh in the uservm directory to create (2) users VMs. One VM will run in SubnetA and the other in SubnetB. These subnets were created as part of base.sh. This script does NOT need to be modified. The script will output the pubic IP of each VM which you can SSH to using the key stored in ./keys/vectra. This is the same key that has been used by cPacket cVu and the Vectra Sensor.
#!/bin/bash

# Do not modify
key=$(cat ../keys/vectra.pub)
rg=($(jq -r '.parameters.virtualNetwork.value.resourceGroup' ../shared/params.json))
vnet=($(jq -r '.parameters.virtualNetwork.value.name' ../shared/params.json))

# Create User VMs.  Subnets and names hard coded for lab
az deployment group create --resource-group $rg --template-file ../uservm/simplevm.json --parameters projectName=User-A adminUsername=vectra adminPublicKey="$key" vnet="$vnet" subnet=SubnetA
az deployment group create --resource-group $rg --template-file ../uservm/simplevm.json --parameters projectName=User-B adminUsername=vectra adminPublicKey="$key" vnet="$vnet" subnet=SubnetB

# Show Public IPs
echo "Public IP of UVM A"
az vm show --resource-group $rg --name "User-A-vm" --show-details --query publicIps --output tsv
echo "Public IP of UVM B"
az vm show --resource-group $rg --name "User-B-vm" --show-details --query publicIps --output tsv
Modifying User Defined Routes/UDRs
To get the traffic to cPacket we need to route UVM traffic to the cPacket load balancer. Vectra has a script called cpacket-redirect.sh located in the udr directory which can be used to modify UDRs. However, some customers may wish to do with their own scripting or manually. Additionally, cPacket has a function as part of their ccloud tool that will modify UDRs. Since routes are being modified a change ticket should be opened by the customer. DO NOT DO THIS WITHOUT APPROVAL.
SSH into UVM A with the usersname
vectraand install system tools. You will need to download your ssh key from./keys/vectrato do this.
ssh -i <name of local key file> vectra@<public-ip-of-uvm>
sudo apt-get update && sudo apt-get -y install inetutils-traceroute
From UVM A perform a tracroute to UVM B. You should see UVM B as the next hop.
traceroute <private-ip-uvm-b>
Add your values for
<cpacket-lb-ip>,<vnet-name>,<rgname>and runcpacket-redirect.shto change the routes.
./cpacket-redirect.sh --action deploy --cpacket-gateway <cpacket-lb-ip> --vnet-name <vnet-name> --resource-grp <rgname> --src-subnets subnetA,subnetB
Recheck the routes from UVM A to UVM B and they should be modifed. You will see the IP address of one of the cVu appliances not the ILB similar to below.
vectra@User-A-vm:~$ traceroute 10.70.4.4
traceroute to 10.70.4.4 (10.70.4.4), 64 hops max
  1   10.70.2.6  1.347ms  0.557ms  0.437ms
  2   10.70.4.4  3.988ms  1.317ms  1.387ms
Start a ping to UVM B and leave it running for several minutes
Verifying Traffic
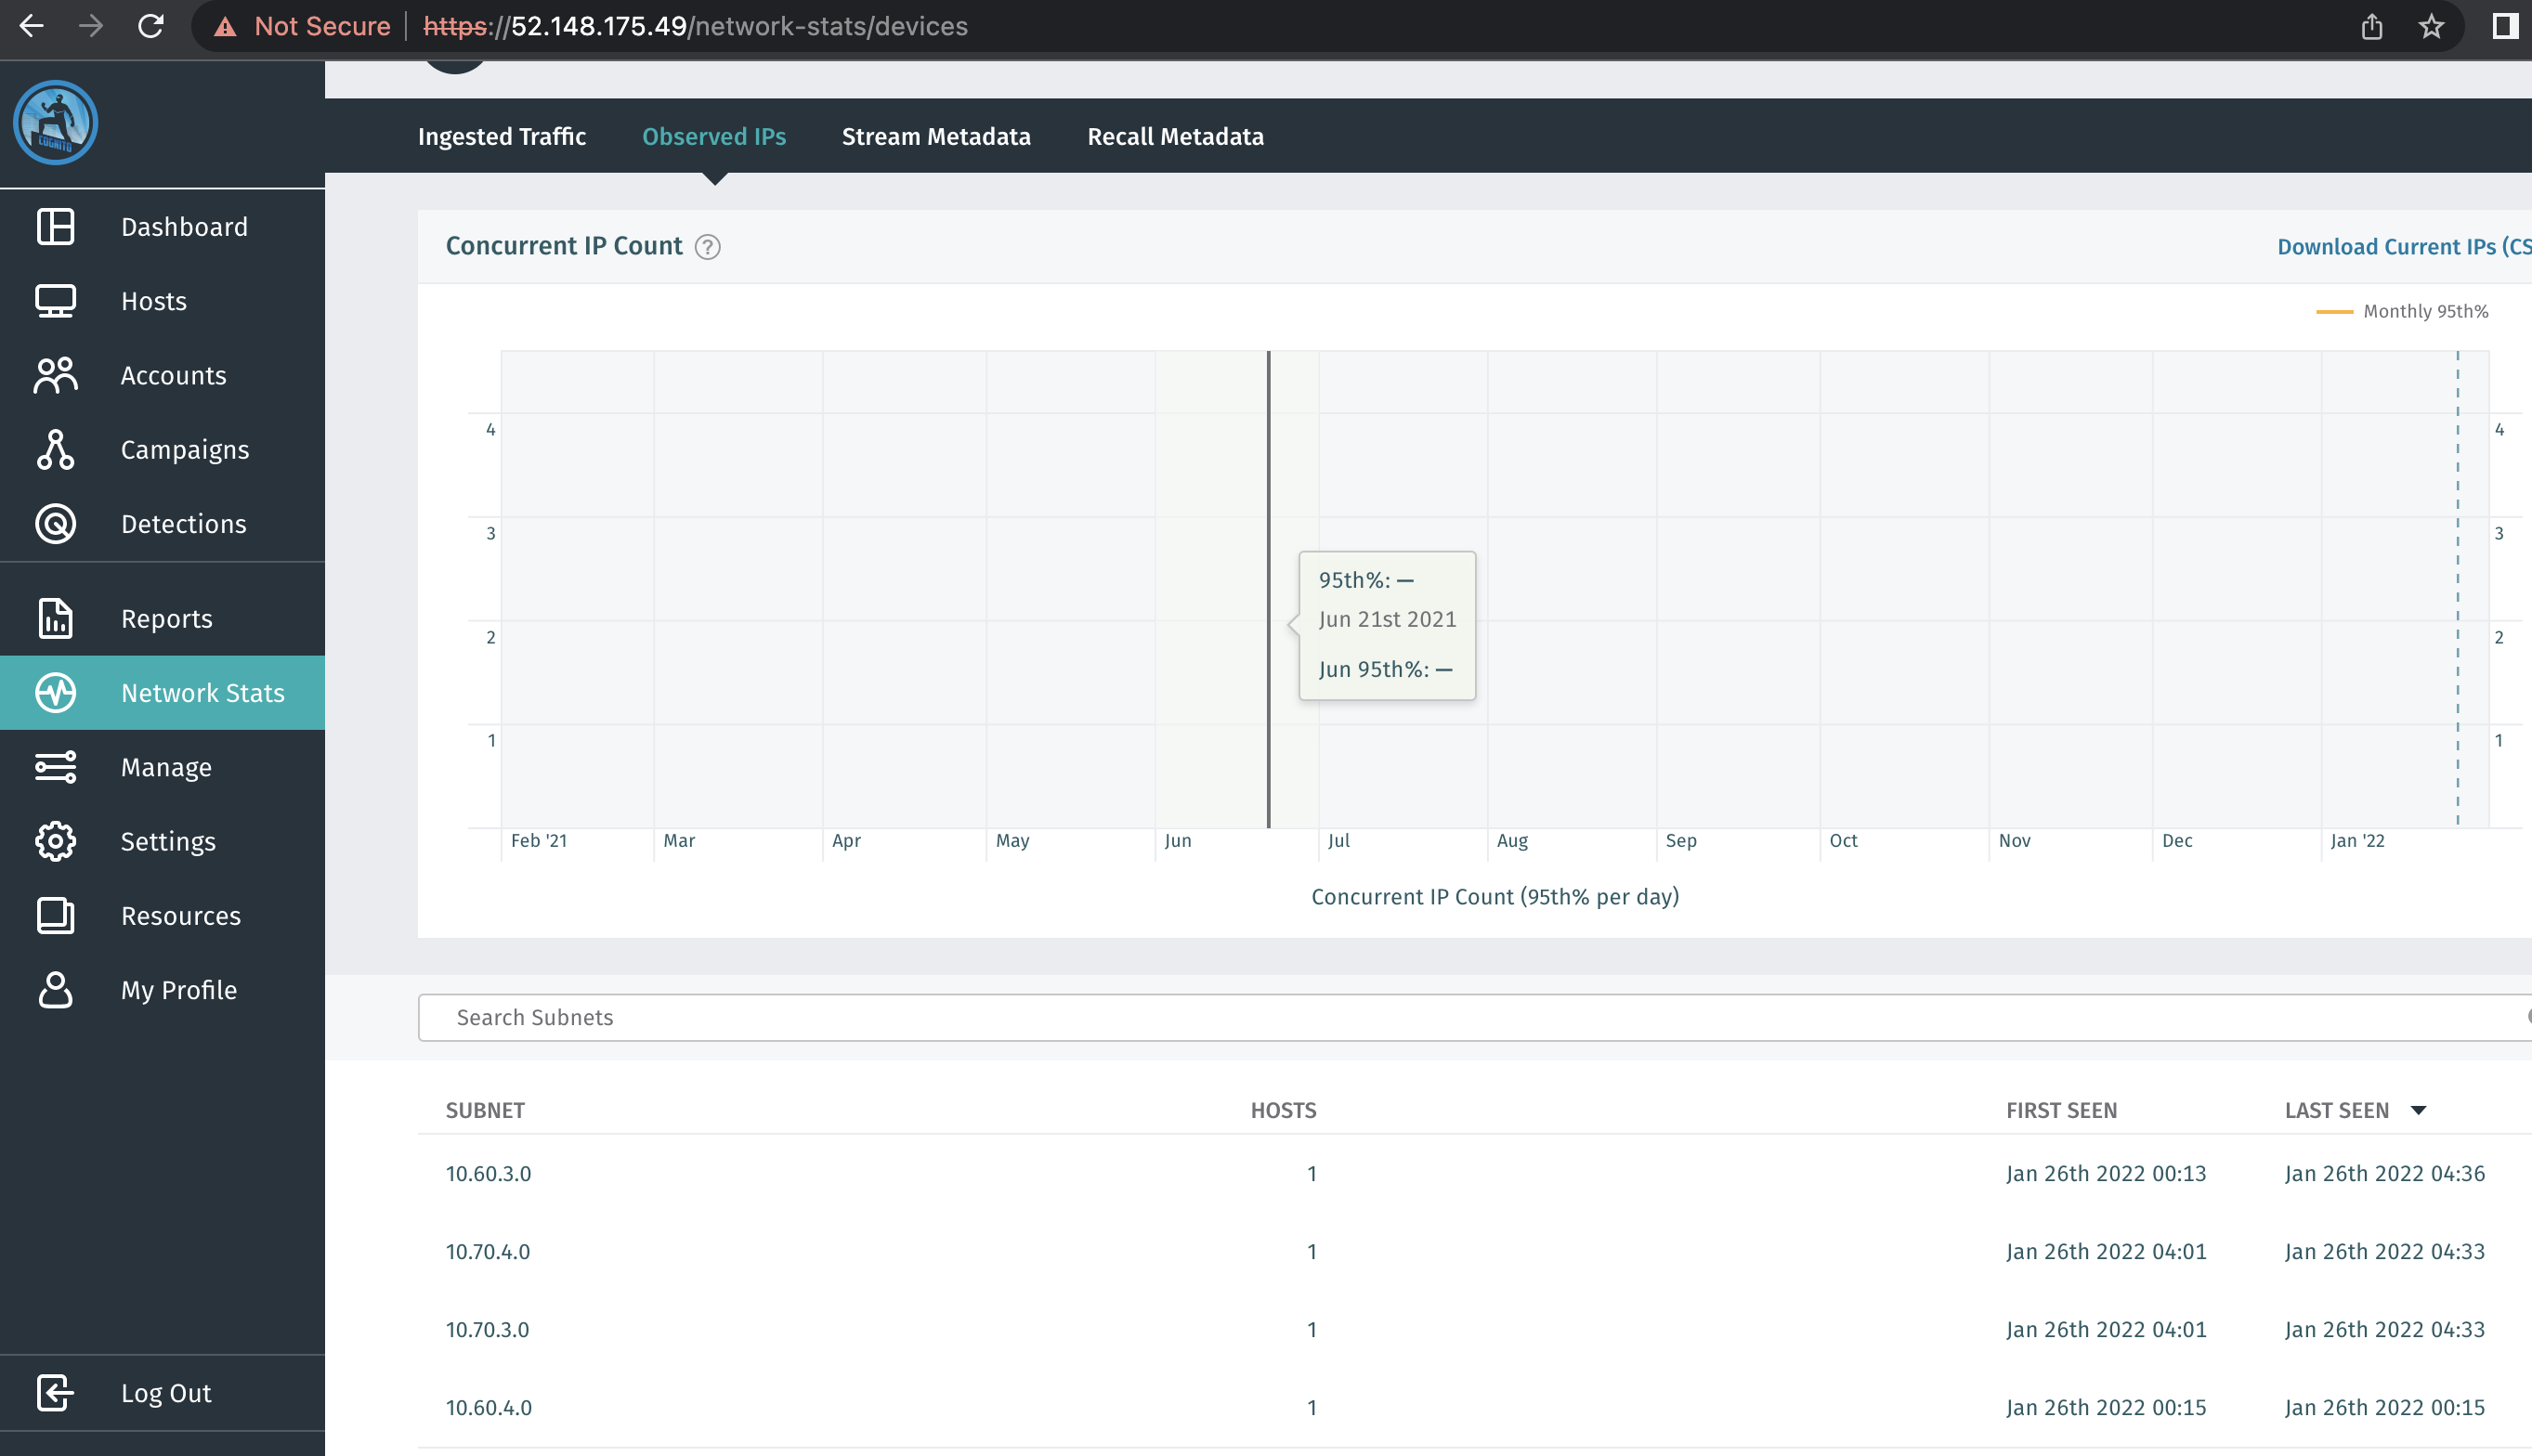
After some time logon to your Brain and navigate to “Network Stats” >> “Observed IPs” and you should see your subnets.
Lab Cleanup once verified
You have successfully deployed Vectra in Azure. As there are significant costs please delete your resource group(s) once your screenshot has been sent to group leader and verified . To cleanup your resource group(s) typeResource Groups in the search bar and select your Resource Group and then click Delete Resource Group. You will delete both Brain and Sensor resource groups.
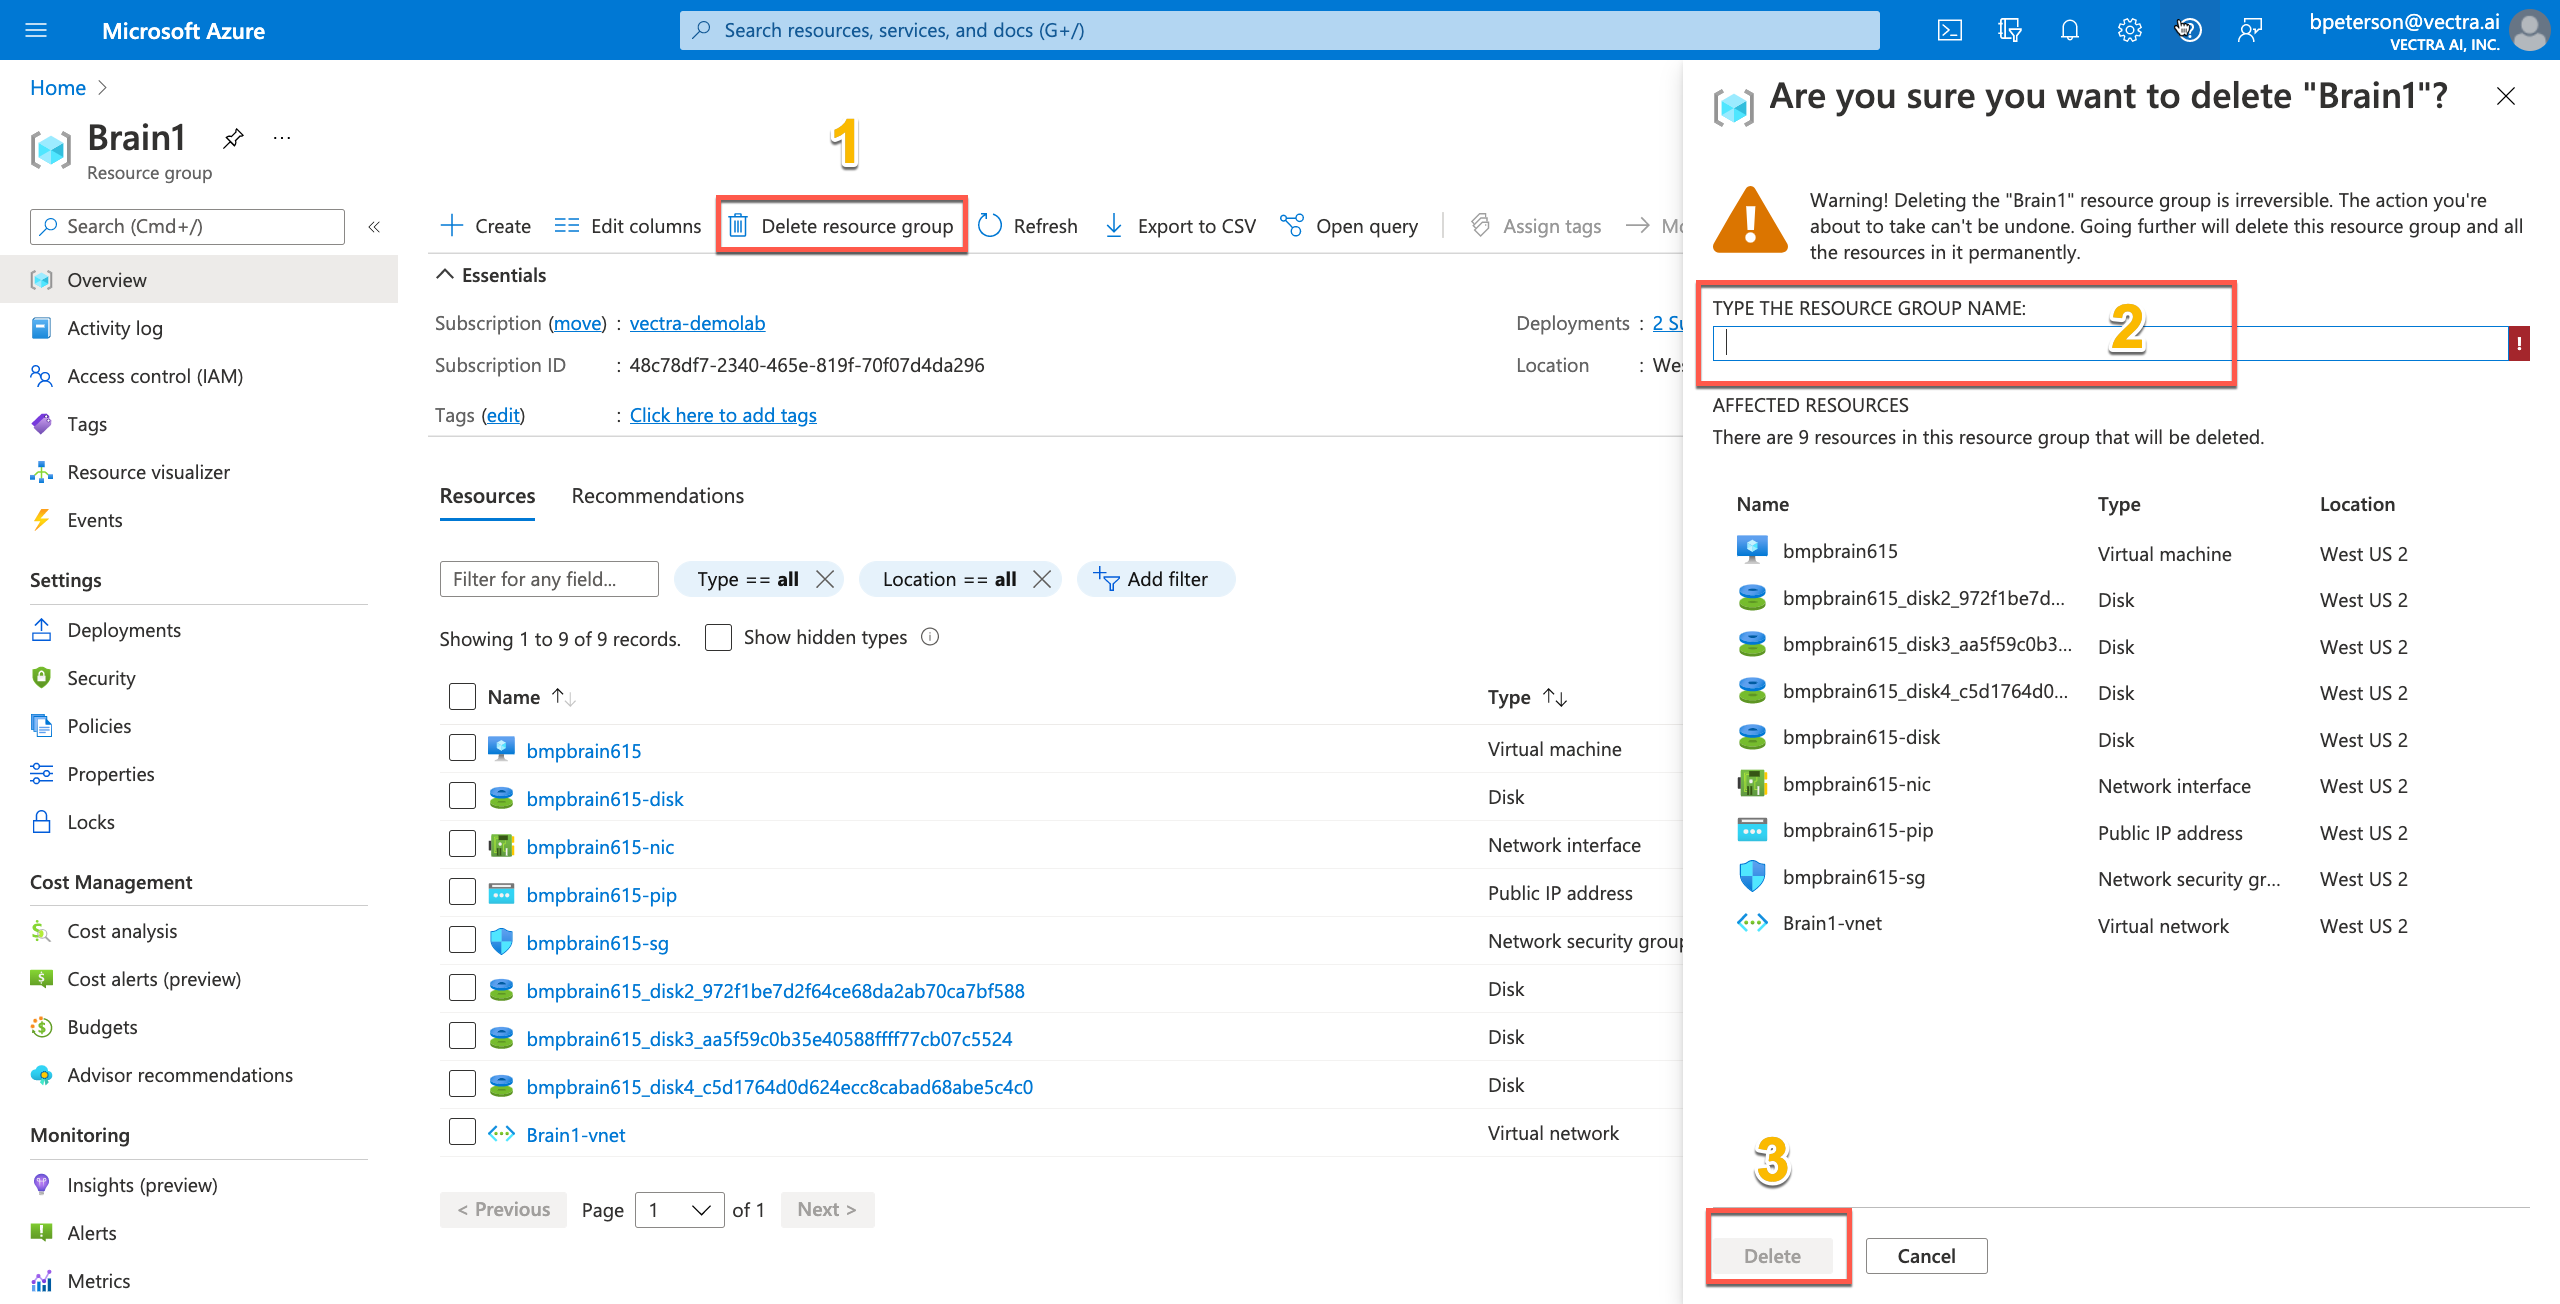
Brain $30 per day
Sensor $7 per day
cPacket $8 per day